※ 在前端畫面顯示ECPay:
● 優化前端:views → index.ejs
<!-- 新增按鈕 -->
    <div>
      <button>綠界支付</button>
    </div>
● 在Vue 組件的資料定義中,新增buyItem來存儲購買的項目和數量:javascripts → index.js
createApp({
  data() {
    return {
      serverDomain: 'http://localhost:30000',
      buyItem: {}, //{"1":8, "2": 5/"id":"amount"}
      products: []
    }
  },

}).mount('#app');
程式碼解說:
serverDomain:- serverDomain: 'http://localhost:30000' 用於設定伺服器的域名,這樣可以在其他方法中使用這個變數來構建請求 URL。
buyItem:- buyItem: {} 初始化為一個空物件,用於存儲購買的項目及其數量。例如,{"1":8, "2":5} 表示產品 ID 為 1 的項目購買了 8 件,產品 ID 為 2 的項目購買了 5 件。
products:- products: [] 初始化為一個空陣列,用於存儲產品的詳細信息。這個陣列會在後續的操作中被填充,例如從伺服器獲取產品列表。
● 使用 {{ buyItem }} ,在模板中顯示資料:views → index.ejs
<body>
  <div id="app">
    {{buyItem}}
  </div>
  </body>
● 使用v-model 綁定元件,讓產品資料即時更新和顯示:views → index.ejs
  <td>
  <input v-model="buyItem[product.id]" type="number" min="0" max="100" step="1">
  </td>
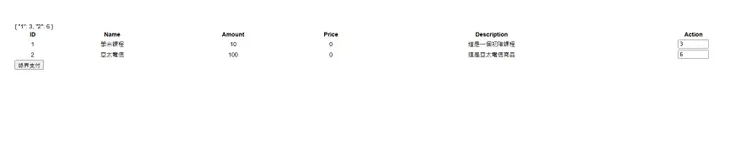
● 結果:
● 根據購買項目生成詳細的產品資料:javascripts → index.js
createApp({
  data() {
    return {
      buyItem: {}, //{"1":8, "2": 5/"id":"amount"}
      products: []
    }
  },

  methods: {
    getItemDetailByBuyItem() {
      return Object.entries(this.buyItems).map(([id, amount]) => ({
        productId: Number(id),
        price: this.products.find(product => product.id === Number(id)).price,
        amount: Number(amount)
      })); //[{productId:1, price: 100, amount: 9}]
    }
  }

}).mount('#app');
程式碼解說:
getItemDetailByBuyItem 方法:- 這個方法返回一個新陣列,陣列中的每個項目都包含購買的產品詳情(productId、price 和 amount)。
Object.entries(this.buyItems):- 將 buyItems 物件轉換為一個由鍵值(key和value)組合的陣列。
- buyItems 物件結構類似 { "1": 8, "2": 5 },轉換後的陣列為 [ ["1", 8], ["2", 5] ]。在這個陣列中,每個元素都是一個陣列,其中包含兩個值:第一個值是鍵(產品ID),第二個值是對應的值(購買數量)。
.map(([id, amount]) => ({...})):- 使用 map 方法遍歷 buyItems 的每一個鍵值對(即產品 ID 和購買數量)。
- 把每個鍵值對轉換成一個包含產品細節的物件。
Number(id):- 將產品 ID 從字串轉換為數字。
this.products.find(product => product.id === Number(id)).price:
- 在 products 陣列中尋找對應 ID 的產品,並獲取其價格。
Number(amount):
- 將購買數量從字串轉換為數字。
●發送付款請求:javascripts → index.js
createApp({
  data() {
    return {
      buyItem: {}, //{"1":8, "2": 5/"id":"amount"}
      products: []
    }
  },
    //打API
    async sendPayment(url, date) {
      try {
        fetch(url, {
          method: 'POST',
          headers: { 'Content-Type': 'application/json' },
          cors: 'no-cors',
          body: JSON.stringify(data)
        })
        .then((res) => {

            if (res.ok) return res.json();

            return res.json().then((json) => Promise.reject(json));

          });

        return result;


      } catch (e) {
        console.error('~ file: index.js ~ line 32 ~ sendPayment ~ e', e)
        throw new Error(e)
      }
    }

  }

}).mount('#app');
程式碼解說:
- 非同步函數 (
async):- 這是定義了一個名為 sendPayment 的非同步函數,表示在函數內部可以使用 await 關鍵字來等待非同步操作完成。
fetch方法:- 用於向指定的 URL 發送 HTTP 請求。
- 用於發送一個 POST 請求,並將 data 作為請求的主體。
- 請求設置:
- method: 'POST':指定請求方法為 POST。
- headers: { 'Content-Type': 'application/json' }:設定請求標頭,表示請求內容的格式是 JSON。
- cors: 'no-cors':設定跨域請求策略。(no-cors:禁止跨域請求訪問某些資源。)
- body: JSON.stringify(data):將 data 物件轉換為 JSON 字符串,並作為請求體發送。
處理回應:
.then((res) => { ... }):處理 fetch 方法返回的 Promise。
- if (res.ok):檢查回應的狀態。如果 res.ok 為 true,表示請求成功,返回解析後的 JSON。
- return res.json().then((json) => Promise.reject(json)):如果請求失敗,返回解析後的 JSON 並將其作為被拒絕的 Promise。
- 錯誤處理 (
try...catch):- 如果發送請求時出現錯誤,會在控制台中記錄錯誤訊息,並拋出一個新的錯誤。
● ECPay支付:javascripts → index.js
async ECPay() {

//檢查 buyItems 是否為空

if (!Object.keys(this.buyItems).length) return alert('沒有選項')
// 處理 items 陣列中的每個產品詳細內容
      const items = this.getItemDetailByBuyItem();
      console.log('~ file: index.js ~ line 50 ~ ECPay ~ items', items);
   //發送支付請求
      const result = await this.sendPayment(`${this.serverDomain}/orders/create`),
       {
      paymentProvider: "ECPAY",
      paymentWay: "CVS",
      contents: items,
     });
      console.log(result);
}
}
程式碼解說:
非同步函數 (async):- async 關鍵字表示這是一個非同步函數,可以使用 await 關鍵字來等待非同步操作完成。
檢查 buyItems 是否為空:
if (!Object.keys(this.buyItems).length) return alert('沒有選項');
- 使用 Object.keys(this.buyItems) 來獲取 buyItems 物件的所有鍵(即項目ID)的陣列。
- Object.keys(this.buyItems).length 返回這個陣列的長度。如果 buyItems 中沒有任何項目,這個長度將為 0。
- 條件判斷:
- if (!Object.keys(this.buyItems).length) 判斷 buyItems 是否為空。如果是空的(長度為0),則條件為真。
- 提示訊息:
- 如果條件為真,則執行 alert('沒有選項'),彈出一個提示框,顯示訊息「沒有選項」。
處理購物車項目:
const items = this.getItemDetailByBuyItem();
console.log('~ file: index.js ~ line 50 ~ ECPay ~ items', items);
- 調用
getItemDetailByBuyItem方法,將buyItems中的每個項目轉換為詳細的產品資訊物件,並將結果賦值給items變數。 - 使用
console.log將items內容輸出到控制台以便檢查。
發送支付請求:
const result = await this.sendPayment(`${this.serverDomain}/orders/create`, {
  paymentProvider: "ECPAY",
  paymentWay: "CVS",
  contents: items,
});
console.log(result);
- 使用
await調用sendPayment方法,向serverDomain/orders/create發送一個支付請求。 sendPayment方法會向 ${this.serverDomain}/orders/create 這個 URL 發送一個 HTTP POST 請求,包括支付提供者(paymentProvider)、支付方式(paymentWay)和購物車內容(contents)。- 將支付請求的結果賦值給
result變數,並輸出到控制台。
● ECPay支付綁定到Button:views → index.ejs
 <!-- 新增按鈕 -->
    <div>
      <button @click="ECPay">綠界支付</button>
    </div>
程式碼解說:
@click="ECPay" 表示當按鈕被點擊時會觸發 ECPay 方法,包括檢查購物車項目、獲取購買項目詳細資訊並發送支付請求。
@click 是 Vue.js 中的事件綁定語法,等同於 v-on:click。它用來監聽按鈕的點擊事件,並在點擊時執行指定的方法。
● 成功畫面:
1.前端畫面:

2.MySQL - ORDERS畫面: