👨💻簡介
🔰ELFK-stack:使用docker-compose建立起tick-stack的架構,撈取的指標從config/telegraf.conf設定,並送往influxdb從起來,chronograf為ui介面,查看撈取的時間序列指標狀態,最後kapacitor則是處理告警的部分.
流程
- ⚙️TICK-stack : telrgraf(送資料) -> influxdb(存資料) -> chronograf(ui) -> kapacitor(alert)
環境建置
本篇github repo在此 -> TICK_Stack-tutorial
telegraf設定
使用telegraf.conf設定輸出資料庫[[outputs.influxdb]]
urls = ["http://influxdb:8086"]
database = "telegraf" # 要使用的資料庫
username = "admin"
password = "admin"
influxdb設定
使用configuration.env設定帳密以及資料庫
# InfluxDB options
INFLUXDB_DB=telegraf
INFLUXDB_ADMIN_USER=admin
INFLUXDB_ADMIN_PASSWORD=admin
kapacitor設定
使用kapacitor.conf
- 設定讀取的資料庫
[[influxdb]]
  enabled = true
  name = "telegraf"
  default = false
  urls = ["http://influxdb:8086"]
  username = "admin"
  password = "admin"
- 設定告警telegram
[telegram]
  enabled = true
  url = "https://api.telegram.org/bot"
  token = "bot-token"
啟動環境
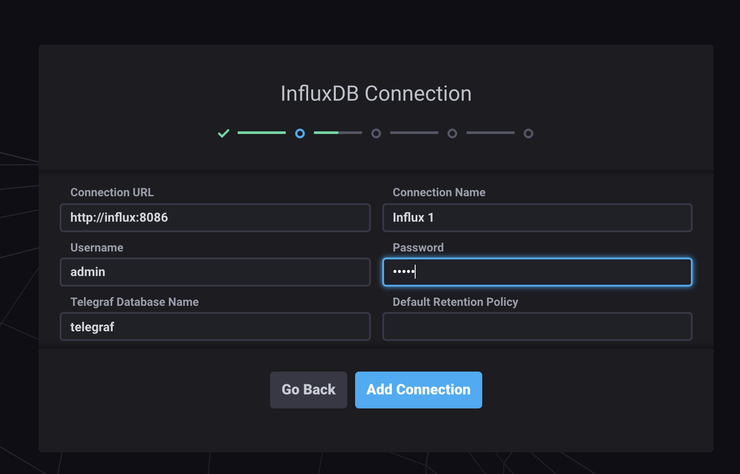
docker-compose up接著去本地chronograf http://IP:8888 設定influxdb以及kapacitor
- http:// IP :8086 for influxdb
- http:// IP :9092 for kapacitor


告警設計
參考cpu_alert.tick.example
使用告警
透過kapacitor
cd /var/lib/kapacitor
# cpu_alert為任務task_id
# 定義任務
kapacitor define cpu_alert -tick cpu_alert.tick -type stream -dbrp telegraf.autogen
# 啟動任務
kapacitor enable cpu_alert
# 停止任務
kapacitor disable cpu_alert
# 刪除任務
kapacitor delete tasks cpu_alert
# 列出所有任務
kapacitor list tasks
透過chronograf
選到左邊的alerting -> write TICKscript

輸入task_id -> 把script貼上 -> 選擇類型為stream -> 選擇db -> 按下儲存後下方會判斷script是否正常

完成後可回到manage task管理當前task 可透過點擊enabled下方圓點一鍵啟動/停用任務

alert history可查看告警訊息
- green:OK
- white:INFO,WARN
- red:CRIT

查看alert寫回db訊息

參考資料
- https://github.com/sz9751210/docker-telegraf-influx-grafana-stack
- https://www.influxdata.com/time-series-platform/kapacitor/
- https://tanjiti.github.io/2018/12/18/%E5%BC%80%E6%BA%90kapacitor%E6%93%8D%E4%BD%9C%E6%89%8B%E5%86%8C/


