承接上篇文章
架設好環境後我們要來安裝 WordPress 了其實安裝 WordPress 非常簡單,但是其中要注意的小細節太多了,若是沒有設定好,接下來在做各種激烈操作的時候就會有一堆問題。
文章目錄:
- 建立 WordPress 資料庫
- 安裝 Wordpress
- 解決 佈景主題 外掛 無法安裝問題
- 解決 永久連結 無法使用 問題
- 手動 安裝 SSL 憑證
首先,建立一個專門給 WordPress 的資料庫,開啟 phpmyadmin


點擊左上方的「新增」,建立一個你喜歡的資料庫名稱,在這邊我使用abcde


建立一個,專門用來管 Wordpress 的帳號,不想另外建立 要直接使用 root 也可以。
點擊右上方的權限,新增使用者權限,使用者自己設,主機名稱請選擇「本機|localhost」,密碼自己設
下方的全域權限請勾全選,點擊右下方的「執行」
這樣新的帳號就創好了,接下來我們要安裝 WordPress
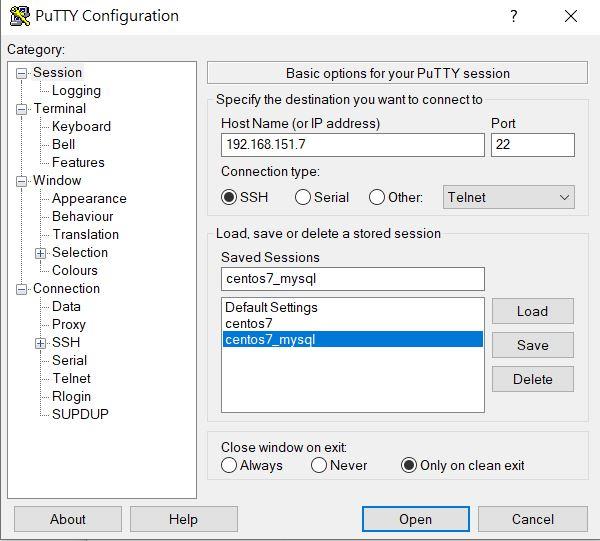
回到終端機 ( PuTTY ),輸入
$ wget https://tw.wordpress.org/latest-zh_TW.tar.gz
這邊下載的是 WordPress 台灣正體中文版
解壓縮
$ sudo tar xvzf latest-zh_TW.tar.gz將解壓縮出來的 WordPress 資料夾裡面的檔案,全部複製到 var/www/html 底下
$ sudo cp -r wordpress/* /var/www/html然後 Apache 這個資料夾底下預設有個 index.html 檔,目前輸入 IP 後看到的都是這個網頁,接下來要將他改個名字 ( 或是刪掉 )
$ cd /var/www/html
$ sudo mv index.html _index.html

這樣就可以看到 index.html 被我們改名字了,而 WordPress 預設的首頁是 index.php,我們到瀏覽器上重新訪問外部 IP
可以看到這個畫面就代表前面的設定都沒問題,點擊「開始安裝吧!」繼續

請輸入「資料庫」的設定

無法寫入 wp-config.php 檔案,解決方式!
點擊之後會出現這個畫面,印象中若是使用 root 登入的話就不會出現,但這邊我們依然可以修正這個錯誤
複製方塊中的全部文字,回到終端機 ( PuTTY )
我們要新增一個 wp-config.php 檔,輸入
$ sudo vim /var/www/html/wp-config.php點擊 i 進入編輯模式,貼上剛才複製的文字 ( 滑鼠右鍵 )

然後點擊 ESC,輸入 :wq
然後再回到瀏覽器上,點擊「執行安裝程式」

前述設定有成功的話,就會進入歡迎畫面,這邊要設定的就是 WordPress 後台的管理帳號了,輸入完資訊後點擊安裝就可以嘍

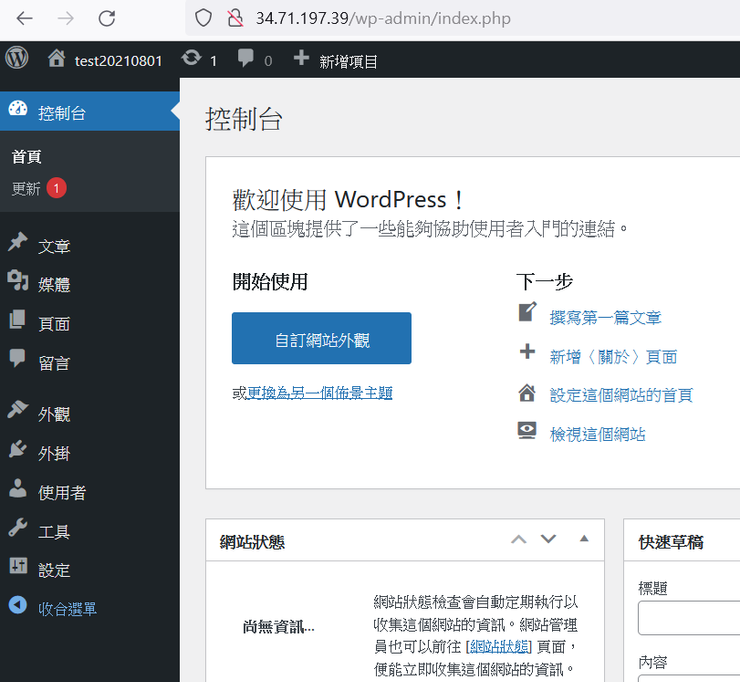
之後要進入後台,則輸入 IP/wp-admin 就可以了
教學到這邊就結束了嗎?當然沒有!
登入之後就會發現,什麼外掛跟佈景主題都不能安裝

WordPress 如需執行這項必要操作,Wordpress 必須存許這個網站的網頁伺服器。
請輸入 FTP 認證以繼續。如不記得認證為何,請聯絡這個網站的主機服務商。
欲執行此動作, WordPress 需要訪問你的網頁伺服器。請輸入 FTP 密碼繼續。若你記不得密碼,你應該向你的主機商聯繫。
解決方式 WordPress 繞過 FTP 自動升級外掛與佈景主題
會遇到這種錯誤,通常是目錄權限不足的問題
請回到終端機 ( PuTTY ),輸入
$ sudo chown -R www-data:www-data /var/www/html/wp-content/

$ sudo chown -R www-data:www-data /var/www/html/wp-includes/
然後再次去修改 wp-config.php 檔,輸入
$ sudo vim /var/www/html/wp-config.php點擊 i 進入編輯模式,在最底下輸入這行,然後保存退出
define('FS_METHOD', 'direct');
然後重啟伺服器及數據庫
$ sudo service apache2 restart

$ sudo service mysql restart

再回到 WordPress 後台去安裝主題或是外掛,就不會出現警告了。
接下來要處理的是修改永久連結的問題

WordPress 更改固定連結 Not Found
WordPress 永久連結 Permalinks 如何修改
WordPress .htaccess 修改問題
首先要修改 Apache 的 apache2.conf,該檔案存放在 etc/apache2 底下

回到終端機 ( PuTTY ) 輸入
$ sudo vim /etc/apache2/apache2.conf
找到 <Directory /var/www/> 這段,將 AllowOverride None 改成 AllowOverride all
<Directory />
        Options FollowSymLinks
        AllowOverride None
        Require all denied
</Directory>

<Directory /usr/share>
        AllowOverride None
        Require all granted
</Directory>

<Directory /var/www/>
        Options Indexes FollowSymLinks
        AllowOverride all
        Require all granted
</Directory>
接下來要新增 .htaccess 檔案

回到這邊,複製這段文字
在 var/www/html 新增 .htaccess 檔,輸入
$ sudo vim /var/www/html/.htaccess然後將剛才複製的文字貼上,保存退出

然後授予 apache 修改 .htaccess 檔案 的權限,輸入
$ sudo chmod 777 -R /var/www/html/.htaccess在這邊為求方便,設定的是最高權限 777,關於權限的設定其實並不建議使用 777,相關知識請見大神文章。
開啟 Apache 的 mod_rewrite 功能,預設是關閉的,透過以下指令來啟動覆寫功能
$ sudo a2enmod rewrite設定完成,重啟伺服器與資料庫
$ sudo service apache2 restart

$ sudo service mysql restart
再回到瀏覽器,進入 WordPress 後台,設定永久連結

本機 Apache 伺服器安裝 SSL 憑證
本機 WordPress 手動安裝 SSL 憑證
Linux 主機 Web server 安裝 SSL 憑證
本地端手動安裝 SSL 憑證 給 WordPress 網站
接下來要介紹的是安裝 SSL 憑證
為何要安裝 SSL 憑證呢?
簡單的來說就是讓你的網頁從非加密連線(http),轉變為加密連線(https)
若是有要進行 SEO (搜尋引擎最佳化) 的話,這將會是很重要的事情
因為 Google 在搜尋時並不會將非 https 連線的網頁,給優先排序
要安裝 SSL 憑證之前兩個先決條件:
- 要有Public IP
- 要註冊域名
在這邊我們使用 GCP 提供的外部 IP 做練習
域名部分則透過 Freenom 來註冊免費的域名

首先去 freenom 註冊一個帳號,註冊帳號這邊不進行教學
然後進行創建 Domain,相關教學請見大神的文章
註冊好域名後就進入管理頁面,點擊 Manage Freenom DNS


在下方 Add Records ,Name 中輸入你想要的A紀錄,在後方 Target 輸入你的 公網 IP
點擊 Save Changes 進行保存,然後是等待了,等待 DNS 設定的時間不一定,有時候 5分鐘就好,但有次我等了一個網上。
一段時間過後,瀏覽器輸入自己的 A紀錄.域名,我這邊的設定是 web.gcproy.ml

可以使用域名訪問到我們的 WordPress 網站後,便可以來申請及安裝 SSL 憑證了
回到終端機 ( PuTTY ),輸入
$ sudo apt install python3-certbot-apache -y

$ sudo certbot --apache -d my.domain
my.domain 記得改成自己的域名,不要複製的太開心嘍
roy@royt20210801:~$ sudo certbot --apache -d web.gcproy.ml

Saving debug log to /var/log/letsencrypt/letsencrypt.log
Plugins selected: Authenticator apache, Installer apache
Enter email address (used for urgent renewal and security notices) (Enter 'c' to
cancel): abcde@gmail.com (一定要輸入email)

- - - - - - - - - - - - - - - - - - - - - - - - - - - - - - - - - - - - - - - -
Please read the Terms of Service at
https://letsencrypt.org/documents/LE-SA-v1.2-November-15-2017.pdf. You must
agree in order to register with the ACME server at
https://acme-v02.api.letsencrypt.org/directory
- - - - - - - - - - - - - - - - - - - - - - - - - - - - - - - - - - - - - - - -
(A)gree/(C)ancel: a

- - - - - - - - - - - - - - - - - - - - - - - - - - - - - - - - - - - - - - - -
Would you be willing to share your email address with the Electronic Frontier
Foundation, a founding partner of the Let's Encrypt project and the non-profit
organization that develops Certbot? We'd like to send you email about our work
encrypting the web, EFF news, campaigns, and ways to support digital freedom.
- - - - - - - - - - - - - - - - - - - - - - - - - - - - - - - - - - - - - - - -
(Y)es/(N)o: y
Obtaining a new certificate
Performing the following challenges:
http-01 challenge for web.gcproy.ml
Waiting for verification...
Cleaning up challenges
Created an SSL vhost at /etc/apache2/sites-available/000-default-le-ssl.conf
Enabled Apache socache_shmcb module
Enabled Apache ssl module
Deploying Certificate to VirtualHost /etc/apache2/sites-available/000-default-le                              -ssl.conf
Enabling available site: /etc/apache2/sites-available/000-default-le-ssl.conf

Please choose whether or not to redirect HTTP traffic to HTTPS, removing HTTP ac                              cess.
- - - - - - - - - - - - - - - - - - - - - - - - - - - - - - - - - - - - - - - -
1: No redirect - Make no further changes to the webserver configuration.
2: Redirect - Make all requests redirect to secure HTTPS access. Choose this for
new sites, or if you're confident your site works on HTTPS. You can undo this
change by editing your web server's configuration.
- - - - - - - - - - - - - - - - - - - - - - - - - - - - - - - - - - - - - - - -
Select the appropriate number [1-2] then [enter] (press 'c' to cancel): 1
Future versions of Certbot will automatically configure the webserver so that al                              l requests redirect to secure HTTPS access. You can control this behavior and di                              sable this warning with the --redirect and --no-redirect flags.

- - - - - - - - - - - - - - - - - - - - - - - - - - - - - - - - - - - - - - - -
Congratulations! You have successfully enabled https://web.gcproy.ml

You should test your configuration at:
https://www.ssllabs.com/ssltest/analyze.html?d=web.gcproy.ml
- - - - - - - - - - - - - - - - - - - - - - - - - - - - - - - - - - - - - - - -

IMPORTANT NOTES:
 - Congratulations! Your certificate and chain have been saved at:
   /etc/letsencrypt/live/web.gcproy.ml/fullchain.pem
   Your key file has been saved at:
   /etc/letsencrypt/live/web.gcproy.ml/privkey.pem
   Your cert will expire on 2021-10-30. To obtain a new or tweaked
   version of this certificate in the future, simply run certbot again
   with the "certonly" option. To non-interactively renew *all* of
   your certificates, run "certbot renew"
 - Your account credentials have been saved in your Certbot
   configuration directory at /etc/letsencrypt. You should make a
   secure backup of this folder now. This configuration directory will
   also contain certificates and private keys obtained by Certbot so
   making regular backups of this folder is ideal.
 - If you like Certbot, please consider supporting our work by:

   Donating to ISRG / Let's Encrypt:   https://letsencrypt.org/donate
   Donating to EFF:                    https://eff.org/donate-le

roy@royt20210801:~$
免費憑證期效是 3個月,自動更新的指令是
$ sudo certbot renew --dry-run這樣就成功嘍!在這邊大神使用的是免費的 SSL 憑證,Let’s Encrypt 所提供的免費憑證使用其為 90天,雖然我們使用 GCP 架設的虛擬機活不過 30天而已 ( 時間到記得註銷帳號,不然會被Google扣錢喔 )


回到瀏覽器,輸入 https://自己的域名,就可以看到 https 連線已經可以運作嘍
在開啟網頁後會發現網頁的排版都亂掉了,這是由於 Wordpress 後台的連結尚未更改
在瀏覽器輸入 https://自己的域名/wp-admin,登入後台

在設定 > 一般 > 將網址更改為你的域名就可以了

重新訪問網頁,就會發現他變正常了
一般來說要永久經營的網站,企業會購買公網IP來使用,也會去域名商註冊專屬的頂級域名,在這邊是做為測試、練習使用,所以不考慮這些,能玩就好。
結語
基本上若是透過各大主機商提供的服務,其實就不用這麼麻煩的架設環境,然後自己安裝 WordPress ,安裝完還要設定一堆東西,基本上是一件安裝搞定所有事情了。
我目前使用過遠振的Linux主機,透過直覺的cPanl介面可以進行一鍵安裝
也使用過 Synology NAS 系統內建的Wordpress 功能。( 群暉的 NAS 真的是個好東西 )
也試用過 Azure 上提供的一鍵安裝 Wordpress 功能
從以上不難看出,其實自架 WordPress 並不是很常見,在爬文尋找各種問題的解方時,也可以發現幾乎都是真的各大託管主機商的操作方式,於是才萌生了撰寫這篇教學的想法,提供給大家,互相交流,共同成長,歡迎留言與我討論互動喔。