SwiftUI的TabView實在太好用啦!我要大大的推廣他ლ(╹◡╹ლ)
換頁+小圓點滑動

手動換頁
TabView {補充:
Text("First")
Text("Second")
Text("Third")
Text("Fourth")
}.background(Color.red)
.tabViewStyle(.page) // 重點:TabView的樣式設成.page
.indexViewStyle(.page)
在官網上看到tabViewStyle有.verticalPage可以使用,我還以為可以像直播App那樣上滑下滑翻頁,結果寫不出來,去查才發現是WatchOS才有。
更改小圓點樣式
寫法.indexViewStyle(.page(backgroundDisplayMode: .interactive))
有四種可以選always, automatic, interactive, never。但除了always,其他都長的一樣🧐

.always

.automatic, .interactive, .never
另一種寫法是寫在tabViewStyle裡.tabViewStyle(.page(indexDisplayMode: .never))有三種可以選always, automatic, never
- never不顯示小圓點
- always, automatic 長得跟上面第二種一樣。
無限自動輪播

自動輪播
自動輪播重點就是增加一個Timer,滑到最後一個的時候,跳回第一個。這邊我有去調TabView的尺寸,做成一般廣告自動輪播的感覺。
struct PageDemoView2: View {
    private let timer = Timer.publish(every: 1.5, on: .main, in: .common).autoconnect()
    @State var selection = "First"
    @State var startIndex = 0
    var order = ["First", "Second", "Third", "Fourth"]
    var body: some View {
    TabView(selection: $selection) {
        ForEach(order, id: \.self) { item in
          Text(item)
        }
      }.frame(height: 200.0) // 調整UI
     .background(Color.red)
     .tabViewStyle(.page)
     .indexViewStyle(.page)
     .cornerRadius(5.0) // 調整UI
     .padding([.leading, .trailing], 10) // 調整UI
     .onReceive(timer) { _ in
         self.startIndex += 1
         if self.startIndex > 3 {
              self.startIndex = 0 // index滑到最後時,把它改回第一個
          }
          self.selection = self.order[self.startIndex]
         print("\(self.selection)")
    }

  }
}
進階版:無限自動+手動輪播
1106更新:
上面寫的自動輪播,缺失了手動的部分。因為只用timer控制播到最後一個的時候跳回第一個,使用者手動去滑的話就會沒效。
無限手動輪播的重點就是要增加假的元件,使用者往後滑動,滑到假元件最後一個,跳回真的第一個。往前滑動,滑到假元件第一個,跳回真的最後一個。
struct PageDemoView2: View {
    private let timer = Timer.publish(every: 1.5, on: .main, in: .common).autoconnect()
    @State var startIndex = 0
    var order = ["First", "Second", "Third", "Fourth"]
    var body: some View {
         TabView(selection: $startIndex) {
              Spacer().tag(-1) // 增加假的第一個
              ForEach(order.indices, id: \.self) { index in
                   Text(order[index]).tag(index)
              }
              Spacer().tag(order.count) // 增加假的最後一個
          }.frame(height: 200.0)
          .background(Color.red)
          .tabViewStyle(.page(indexDisplayMode: .never)) // 把小圓點藏起來
          .cornerRadius(5.0)
          .padding([.leading, .trailing], 10)
          .onReceive(timer) { _ in // timer自動跳
              self.startIndex += 1
              if self.startIndex > 3 {
                  self.startIndex = 0
               }
          }.onChange(of: startIndex) { newValue in  // 手動滑動時
           if startIndex == order.count { // 往後滑動,滑到假的最後一個
                startIndex = 0            // 跳回真的第一個
           } else if startIndex == -1 {
                startIndex = order.count - 1 // 往前滑動,滑到假的第一個
           }                                 // 跳到真的最後一個
        }
    }
}
用圖來說明的話,紅色是真的要顯示的元件,綠色是我為了達成無限輪播做的假元件(Spacer().tag(-1)和Spacer().tag(order.count))

使用者滑到第三頁

使用者滑到第四頁

使用者滑到最後的假元件,跳到真的第一個
反之同理。不過這個作法需要注意的地方是因為實際上的元件數量跟顯示的對不起來。以上面為例,使用者只看到四頁,但小圓點會顯示六個,所以這邊沒辦法用TabView預設的小圓點,需要自己額外刻UI。
參考資料:
底部TabBar分頁
底部TabBar也可以用SwiftUI來實現,直接貼官網的範例
TabView {
    ReceivedView()
    .badge(2)
    .tabItem {
        Label("Received", systemImage: "tray.and.arrow.down.fill")
    }
    SentView()
    .tabItem {
        Label("Sent", systemImage: "tray.and.arrow.up.fill")
    }
    AccountView()
    .badge("!")
    .tabItem {
        Label("Account", systemImage: "person.crop.circle.fill")
     }
}
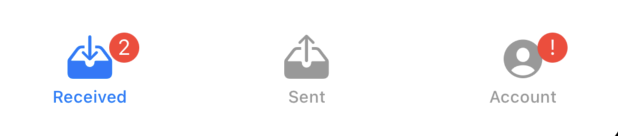
TabBar
比起UIKit code精簡好多,實在太讚了ლ(╹◡╹ლ)ლ(╹◡╹ლ)ლ(╹◡╹ლ)