圖像互換格式(Graphics Interchange Format, GIF)是一種媒體格式,可以將多偵的圖像組合成一個連續的動畫。無論是在社交媒體上分享有趣的動畫,還是在網站上展示產品的動態效果,GIF都是一個絕佳的選擇。
上一篇文章說明了Pillow套件的基礎操作,例如圖像的縮放,裁減,旋轉、合併等等,而這篇文章,將介紹如何使用上一篇提到的技巧,製作出流暢的GIF動畫。Pillow將檔案儲存成GIF格式的函式與上一章介紹的一樣,是使用 Image.save() ,而 save有多個參數可以控制GIF的屬性,以下是常見的參數:
image.save(fp: str,
           save_all: bool,
           append_images: list,
           optimize: bool,
           duration: int | list,
           loop: int)
image:GIF第一幀的圖。save_all:是否保存多幀GIF。append_images:要追加為GIF的其他圖像串列。duration:每幀的持續時間,以毫秒為單位。可以是單一整數(對所有幀使用相同的持續時間)或整數串列(每幀的持續時間)。loop:GIF的播放次數。0表示無限循環,1表示播放一次,2表示播放兩次,依此類推
範例1-使用繪製製作動畫
先來看圖像:

square_animation.gif
這是一個200x200的圖像,中心有一個紅色矩形,從100x100,每幀邊長各增長10像素,直到填滿200x200的空間,每幀的持續時間為100ms,並且無限循環。
在說明如何製作之前,先來介紹一個可以生成新圖像的函式:
Image.new(mode: str, size: tuple | str, color)
mode:圖像的顏色模式。常見的模式有:'RGB': 三通道,紅色、綠色和藍色。'RGBA': 四通道,紅色、綠色、藍色和透明度/alpha。'L': 灰度模式。'1': 二值模式,只有黑和白。
size:圖像的尺寸,表示為(width, height)。color:背景顏色。對於'RGB'模式,這將是一個三元組,例如(255, 255, 255)表示白色,也可以使用顏色的英文名,如'white'。對於'L'模式,這將是一個介於0(黑色)和255(白色)之間的整數。
例如生成一個100x100,背景顏色為藍色的圖像:
from PIL import Image
img = Image.new('RGB', (100, 100), (0, 0, 255))
img.save(r'blue_square.png')

blue.png
介紹完 new()之後,就可以開始介紹如何製作了。
製作過程
首先,我們需要一個200x200、背景為透明的圖像:
from PIL import Image, ImageDraw
img = Image.new('RGBA', (200, 200), (255, 255, 255, 0))
接著,在圖像的中間繪製100x100的紅色矩形:
draw = ImageDraw.Draw(img)
upper_left = (100 - 50, 100 - 50)
lower_right = (100 + 50, 100 + 50)
draw.rectangle([upper_left, lower_right], fill='red')
img.save(r'red_square.png')

red_square.png
接下來,因為每次邊長都會增加十,也就是說,下一張圖像的矩形大小會是110x110,為了維持在圖像中央,矩形左上角的點座標會是(100 - 55, 100 - 500),右下地的點座標則是(100 + 55, 100 + 55),依此類推,下一次就是(100 - 60, 100 - 60)與(100 + 60, 100 + 60),直到(0, 0)與(200, 200)時,紅色矩形填滿整個圖像。我們利用 for 迴圈來繪製每一張圖像,並且將圖像儲存至 images 的列表內,程式碼如下:
# 創建一個圖像列表
images = []
for i in range(100, 201, 10):
    # 創建一個200x200的透明背景
    img = Image.new('RGBA', (200, 200), (255, 255, 255, 0))

    # 在正中間繪製紅色矩形
    draw = ImageDraw.Draw(img)
    upper_left = (100 - i//2, 100 - i//2)
    lower_right = (100 + i//2, 100 + i//2)
    draw.rectangle([upper_left, lower_right], fill='red')

    images.append(img)
接下來,我們只要將圖像利用 save 輸出成GIF就完成了,第一幀圖像是 images列表的第一個元素,因此使用 images[0].save() 來製作GIF,按照上面的格式依序填入參數:
images[0].save(r'square_animation.gif',
                save_all = True,
                append_images = images[1:],
                optimize = False,
                duration = 100,
                loop = 0)
值得注意的是 append_images = images[1:],使用列表分割使得 images[0] 不會出現兩幀。以下是完整的程式碼:
from PIL import Image, ImageDraw

# 創建一個圖像列表
images = []
for i in range(100, 201, 10):
    # 創建一個200x200的透明背景
    img = Image.new('RGBA', (200, 200), (255, 255, 255, 0))

    # 在正中間繪製紅色正方形
    draw = ImageDraw.Draw(img)
    upper_left = (100 - i//2, 100 - i//2)
    lower_right = (100 + i//2, 100 + i//2)
    draw.rectangle([upper_left, lower_right], fill='red')

    images.append(img)

# 將圖像列表保存為GIF
images[0].save(r'square_animation.gif',
               save_all = True,
               append_images = images[1:],
               optimize = False,
               duration = 100,
               loop = 0)
範例二-圖像旋轉
接下來用上一篇文章提到的 rotate() 製作如下動畫:

rotated_animation,gif
這是一個100x100的水藍色矩形,以逆時針每次旋轉10度,無限循環,每幀的持續時間為100ms。
首先一樣使用 new() 來製作一個100x100的水藍色圖像:
from PIL import Image
base_img = Image.new('RGB', (100, 100), color = 'aqua')
base_img.save(r'aqua.png')

aqua.png
來看看轉五十度的圖像:

rotated.png
旋轉成功,那我們就可以使用 for 迴圈來快速製作旋轉10度到350度的圖像,由於旋轉0度等於360度, save 的 loop 參數會自動幫我們回到第一幀圖像,因此我們 for 迴圈只要到 350 就行了。
rotated_images = []
# 旋轉圖像
for angle in range(10, 360, 10):
    rotated_images.append(base_img.rotate(angle))
將圖像列表合併成GIF動畫:
# 將旋轉的圖像保存為GIF
rotated_images[0].save(r'rotated_animation.gif',
                      save_all = True,
                      append_images = rotated_images[1:],
                      optimize = False,
                      duration = 100,
                      loop = 0)
製作旋轉圖像也可以使用Python的生成式,完整程式碼如下:
from PIL import Image
# 創建一個水藍色圖像
base_img = Image.new('RGB', (100, 100), color = 'aqua')

# 旋轉圖像
rotated_images = [base_img.rotate(angle) for angle in range(0, 360, 10)]

# 將旋轉的圖像保存為GIF
rotated_images[0].save(r'rotated_animation.gif',
                      save_all = True,
                      append_images = rotated_images[1:],
                      optimize = False,
                      duration = 100,
                      loop = 0)
範例三-圖像裁剪
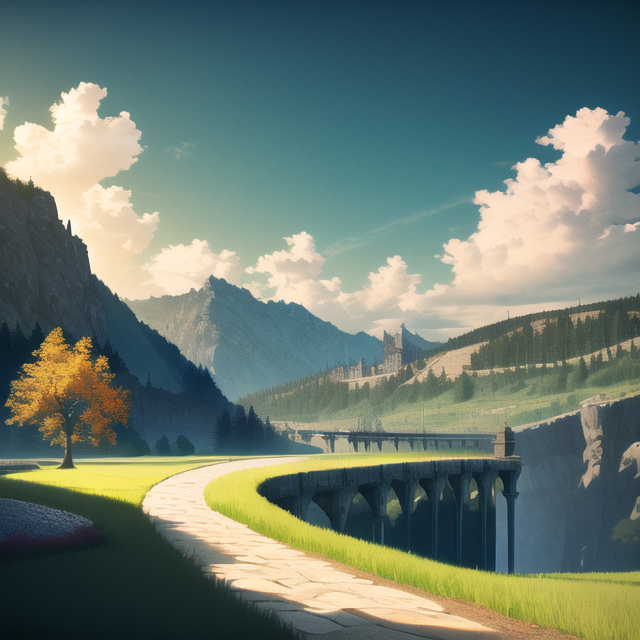
現在有一張風景圖:

landscape.png
我們希望能擁有以下效果:

sliding_window.gif
這張gif的大小為640x300,每幀擷取的部份的會往下5像素,到最底後會回彈,並以每幀往上5巷素的方式移動,直到回到圖像的最頂端,無限循環,每幀的持續時間為50ms。
一開始,我們先讀入 landscape.png,並顯示其大小:
from PIL import Image
img = Image.open(r'landscape.png')
width, height = img.size
print(f'大小:{width}x{height}')
大小:640x640
先擷取(0, 0)到(640, 300)的範圍:
cropped = img.crop((0, 0, 640, 300))
cropped.save(r'cropped.png')

cropped.png
接著只要一路以每幀5像素的速度向下裁剪,直到碰到底部,也就是裁剪到(0, 340, 640, 640):
for step in range(0, height - 300 + 1, 5):
    box = (0, 0 + step, width, 300 + step)
    cropped = img.crop(box)
    images.append(cropped)
由於碰到底部要回彈,也就是將剛剛的過程反著再來一遍,我們可以直接複製 images內倒數第二個元素到第二個的元素,也就是去掉頭尾,然後連接到原本 images的後面,程式碼如下:
images += images[-2:0:-1]
接著將圖像列表轉為GIF並儲存:
images[0].save(r'example3\sliding_window.gif',
                save_all = True,
                append_images = images[1:],
                optimize = False,
                duration = 50,
                loop = 0)
完整程式碼如下:
from PIL import Image

img = Image.open(r'landscape.png')
images = []
width, height = img.size

for step in range(0, height - 300 + 1, 5):
    box = (0, 0 + step, width, 300 + step)
    cropped = img.crop(box)
    images.append(cropped)

images += images[-2:0:-1]

images[0].save(r'sliding_window.gif',
                save_all = True,
                append_images = images[1:],
                optimize = False,
                duration = 50,
                loop = 0)
範例四-圖像合併
有三張風景圖:

0.png

1.png
2.png
我們可以直接使用 blend()來達成如下效果:

blend.gif
利用Python的生成式將圖像依序讀入並存於 images列表中 :
from PIL import Image

images = [Image.open(f'{img}.png') for img in range(3)]
將 images列表存為GIF:
images[0].save(r'blend.gif',
               save_all = True,
               append_images = images[1:],
               optimize = False,
               duration = 500,
               loop = 0)
但這樣轉場過於單調,我們可以透過調整 alpha參數來製作淡出的效果,淡出的過程每幀持續時間100ms,每次淡出圖像的透明度增加10%,圖像每幀持續時間300ms:

fade_out.gif
一樣先讀入圖像,不過為了等等製作淡出動畫方便, base_images的最後我們再增加一張開頭的圖像:
from PIL import Image

base_images = [Image.open(f'{img}.png') for img in range(3)]
base_images.append(base_images[0])
images = []
先將目前顯示的圖像加入到 images中,接著開始製作淡出動畫,淡出圖像的透明度每幀增加10%:
for i in range(len(base_images) - 1):
    # 將目前圖像加入至images
    images.append(base_images[i])

    # 每幀淡出圖像的透明度增加10%
    for alpha in range(10):
        blend = Image.blend(base_images[i], base_images[i + 1], alpha = alpha / 10)
        images.append(blend)
淡出過程有10幀圖像,這個過程每幀100ms,而顯示完整圖像時每幀300ms,完整圖像分別位於 images[0]、 images[11]、 images[22],也就是說,當索引值是11的倍數時,持續時間須為300ms,剩下的每幀持續時間為100ms,我們利用以下程式碼製作 durations陣列:
for i in range(len(images)):
    if i % 11:
        durtions.append(100)

    else:
        durtions.append(300)
最後將圖像列表儲存為GIF就成功啦:
images[0].save(r'example4\fade_out.gif',
               save_all = True,
               append_images = images[1:],
               optimize = False,
               duration = durtions,
               loop = 0)
完整程式碼如下:
from PIL import Image

base_images = [Image.open(f'example4\\{img}.png') for img in range(3)]
base_images.append(base_images[0])
images = []

for i in range(len(base_images) - 1):
    # 將目前圖像加入至images
    images.append(base_images[i])

    # 每幀淡出圖像的透明度增加10%
    for alpha in range(10):
        blend = Image.blend(base_images[i], base_images[i + 1], alpha = alpha / 10)
        images.append(blend)

durtions = []

for i in range(len(images)):
    if i % 11:
        durtions.append(100)

    else:
        durtions.append(300)

images[0].save(r'example4\fade_out.gif',
               save_all = True,
               append_images = images[1:],
               optimize = False,
               duration = durtions,
               loop = 0)
以上就是一些利用Pillow套件製作gif的範例,範例程式碼與圖片可以在此查看與下載:YukiHataRin/vocus_gif (github.com)。感謝大家的閱讀!