這篇心得 Automatic1111 (A1111)/ Vlad Diffusion (Vlad)介面通用。
更新/安裝
Vlad/A1111已安裝ControlNet:Extensions > Installed > Check for updates > Apply & restart UI (建議重開程式)
新安裝:
Extensions > Available > Load from: >找到sd-webui-controlnet > Install > 等畫面變亮 > Installed > Apply & restart UI (建議重開程式)
注意!
雖然安裝會一併下載Preprocessor,但ControlNet的model通常需要自己手動下載。這次1.1更新因為舊版的model已不適用,可全部移除後前往此頁面下載:https://huggingface.co/lllyasviel/ControlNet-v1-1/tree/main
總共有14個model,要下載的是副檔名".pth"的檔案,下載後放到extensions或extensions-builtin資料夾中的"sd-webui-controlnet\models"。
".yaml"的部分應該已在該資料夾內,如果沒有才一併下載。另外,需要移除的舊版model也是在這個資料夾中。需要注意的是.pth、.yaml是兩個檔案一組的,所以請確認下載的.pth都有對應的.yaml。
這次心得使用的model是:

Tile Resample - 忠實放大、增添細節
我在放大/多道提示詞的好幫手:MultiDiffusion插件 - Stable Diffusion一文中提到,Noise Inversion可在Image2Image放大運算時相當程度保留原圖構圖。ControlNet的Tile Resample也有同樣的功能,而且更為忠實。
另外,ControlNet的model可以搭配MultiDiffusion的Tiled VAE使用來減少VRAM用量,但Tiled Diffusion部分會有衝突,往往無法一起使用。
接下來就要收入場費了(並沒有)
首先用Text2Image生成基礎原圖:

model: chilloutmix
vae: blessed2.vae.pt

+
complex 3d render ultra detailed of a beautiful female android, cyborg, sitting, robotic parts, 150 mm, beautiful studio soft light, rim light, dramatic lighting, neon lights, vibrant details, luxurious cyberpunk, [<lora:JapaneseDollLikeness_v15:0.5>], lace, hyper realistic, anatomical, facial muscles, silver hair, white hair, hair floating in air, (robotic eyes), cable electric wires, microchip, elegant, cyberpunk background, dark background, beautiful background, octane render, H. R. Giger style, 8k, best quality, masterpiece, illustration, extremely delicate and beautiful, extremely detailed , (realistic, photo-realistic:1.37), masterpiece, best quality, absurdres, extremely detailed,
-
bad-hands-5,  ng_deepnegative_v1_75t.pt, (low quality, worst quality:1.4), (monochrome:1.1), (greyscale), watermark, text, blurry, jpeg artifacts, cropped, normal quality, signature, username, artist name, cartoon, canvas frame, lowres, (disfigured), (bad art), (deformed), (extra limbs), (b&w), weird colors, (duplicate), (morbid), (mutilated), mutated hands, (poorly drawn hands), (poorly drawn face), (mutation), (ugly),  (bad proportions), cloned face, out of frame, gross proportions, (malformed limbs), (missing arms), (missing legs), (extra arms), (extra legs), fused fingers, (long neck), lowres, (grayscale), (skin spots), acnes, skin blemishes, (age spot), (nsfw)

Sampling method: DPM++ SDE Karras
Sampling steps: 33
Width: 512
Height: 784
CFG Scale: 5
Clip Skip: 1
Seed: 2832472998

*<lora:JapaneseDollLikeness_v15:0.5> LoRA模組由此下載
*bad-hands-5 Textual Inversion由此下載
*ng_deepnegative_v1_75 Textual Inversion由此下載
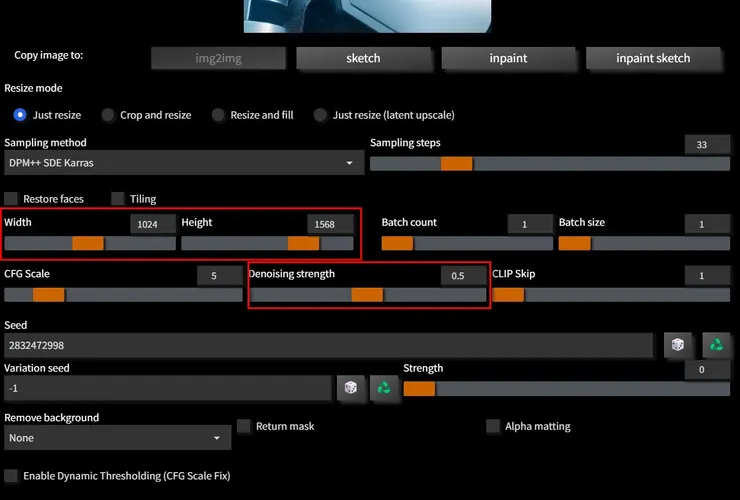
接著我將上圖傳到Image2Image,使用原本的+/-Prompts和設定,只改了下圖紅框中的設定,將圖放大一倍為 1024 x 1568:
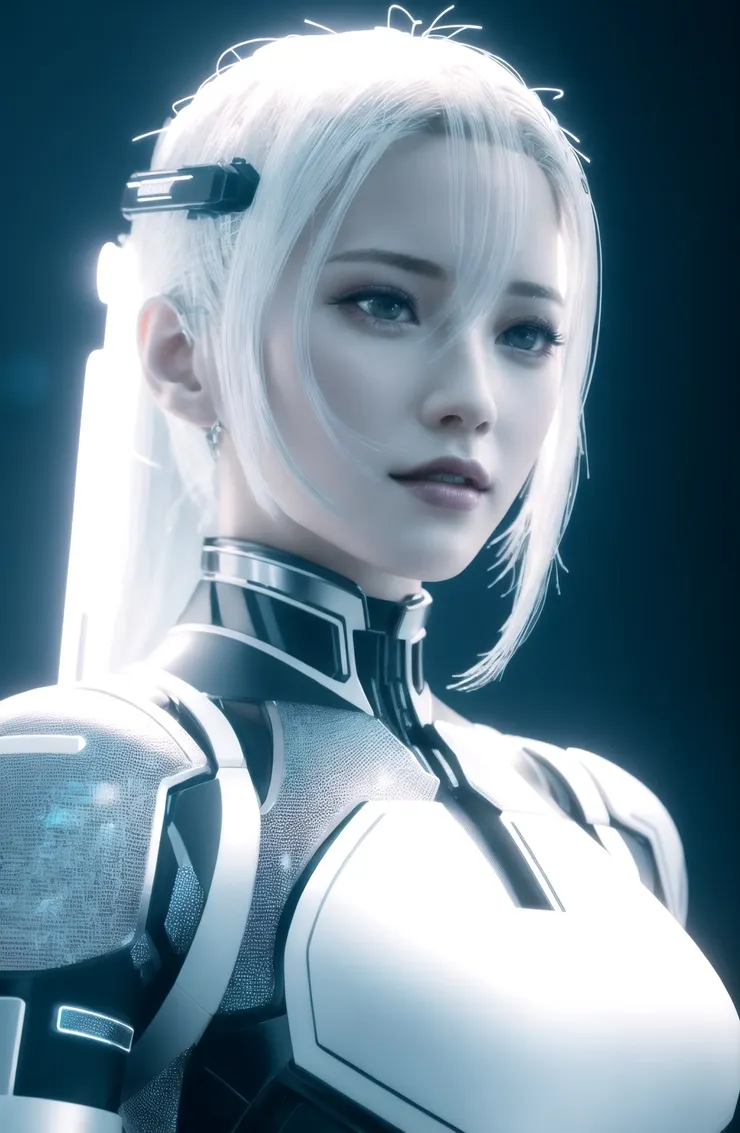
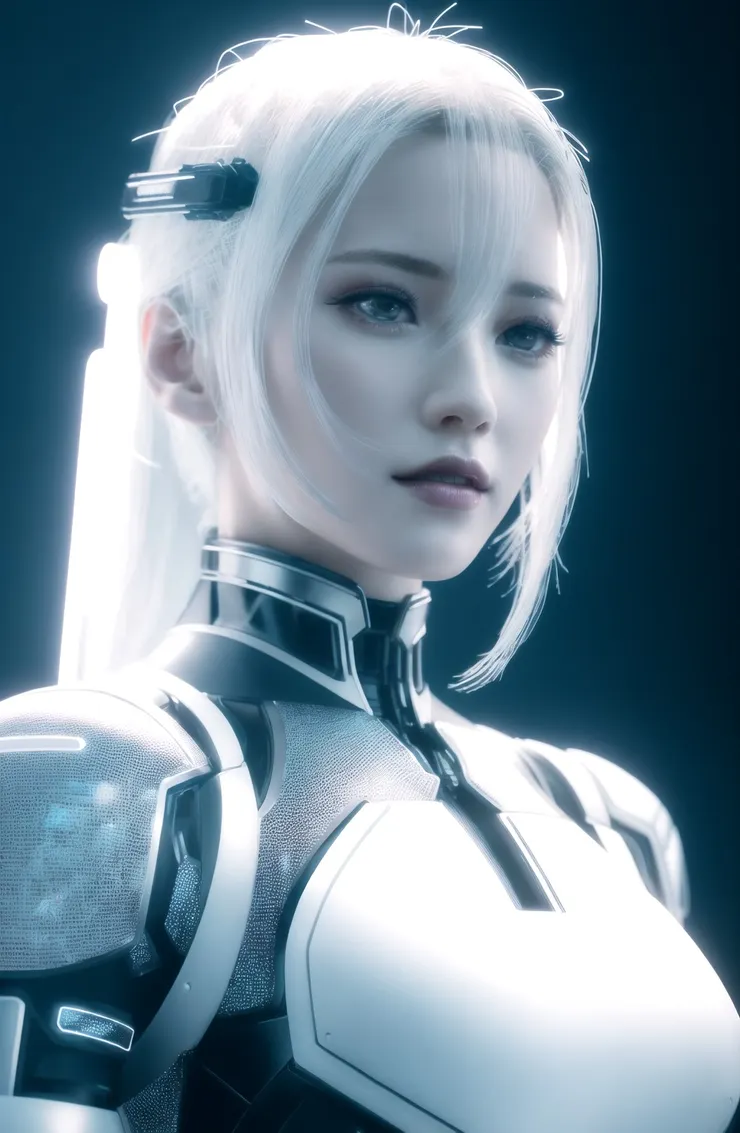
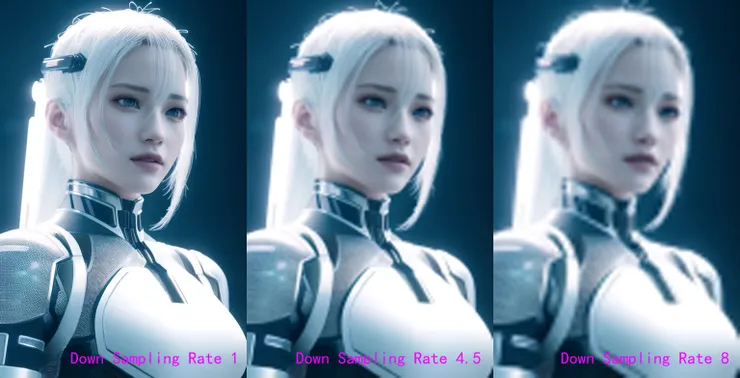
接下來的四張圖全都使用了同樣的設定,差別是:
1張無使用ControlNet, 3張使用了ControlNet的Tile Resample,但使用了三種"Down Sampling Rate"。下圖是四圖同框的比較圖:
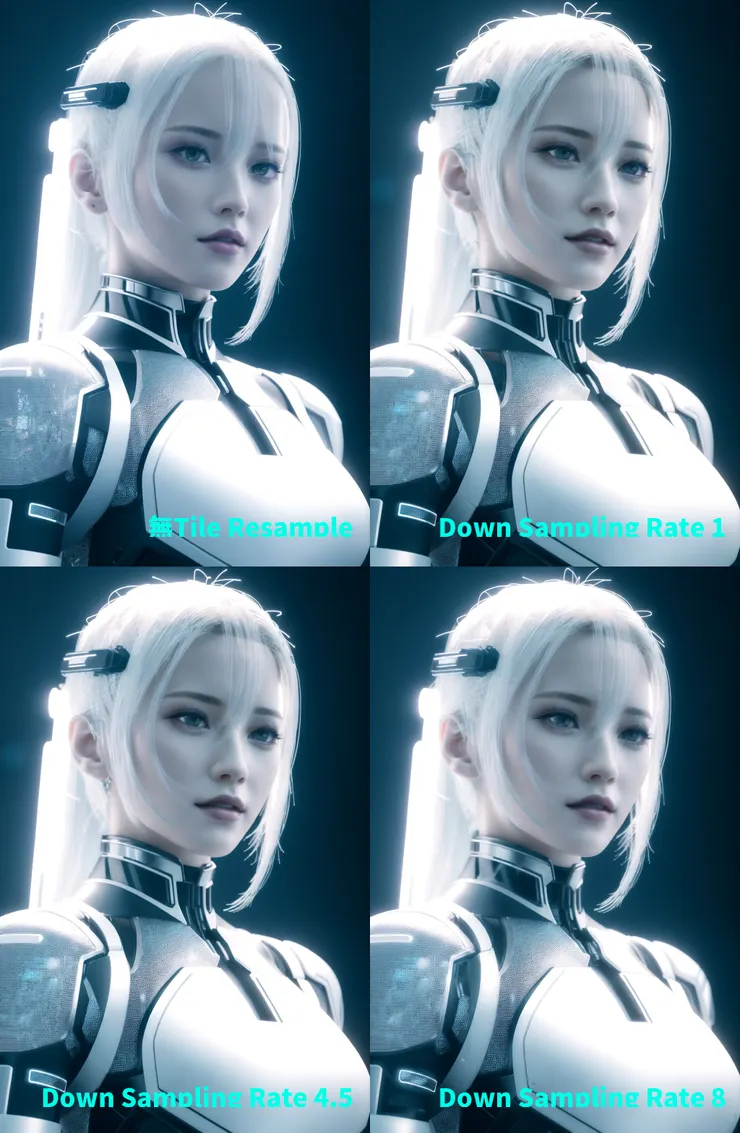
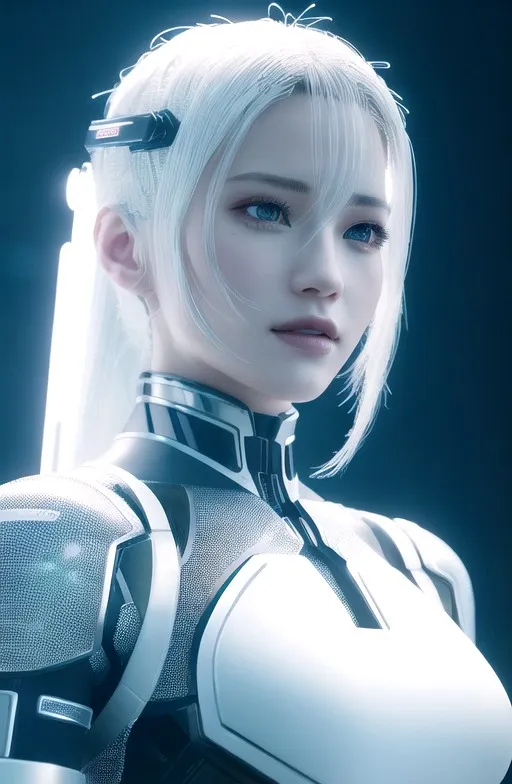
再放一次512x784原圖方便對照。
乍看一下可能覺得差別不大,但和原圖對比過的話會發現,有使用Tile Resample的三張的臉看起來和原圖像是同一個人,沒有使用的則看起來像是不同的人,尤其「眼形」的部分特別明顯。
另外像是下巴下方黑底領口的細部紋路,也是只有使用Tile Resample的三張保留了下來。另外一些護具的細部尖尖角角的輪廓,也只有Tile Resample的圖保留了下來。
並且Tile Resample保留相似度的同時仍增添了細節,例如肩膀護具的網孔紋理,在保留其特徵的前提下解析度和細節都獲得了提升:


簡要言之,Down Sampling Rate數值越大,細節的自由度越高,原因在於Down Sampling Rate數值越大,ControlNet model運算時建立的原圖參考圖就越模糊:
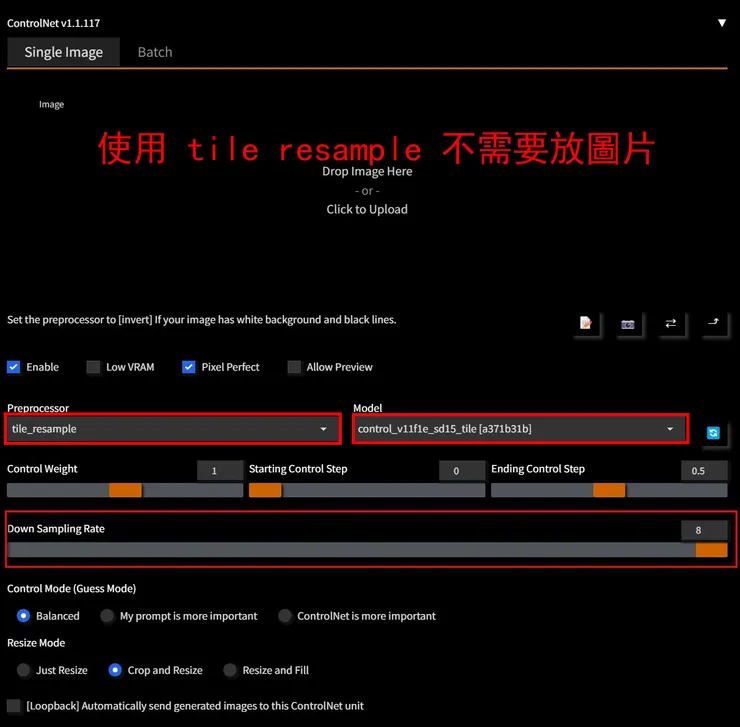
使用時的ControlNet設定參考如下:
祝大家算圖愉快!